|
Whether this is your first cosplay, or your millionth cosplay, chances are you've had to style a wig or will need to style one in the near future.
Wigs can be challenging, I know this is personally my least favourite thing to do because it's not something I've had a lot of experience with. But by following tutorials and with lots of practice I find ways to get the job done! I wanted to share with you the few things that I have learned about wig styling and also give you a few resources that you should definitely check out! 1. Should I use product on my wig? - Absolutely! You will need to use products on your wig in order to get it to hold it's shape and also to detangle it. You won't need to use a lot of products like moose, or volumizing spray or anything like that, but you will need a good strong hairspray and a good detangler. I would recommend getting yourself a can of Got2B Glued and also Mane and Tail detangler. 2. How do I get my wig to "defy gravity"? - In order to make those awesome spikes or gravity defying bangs, you will need strong hair spray, a blow dryer, a flat iron or curling iron, a comb and a lot of patience. You will need to do a lot of back combing on the wig in order to get the fibres to bunch at the bottom and make a strong base. Don't be afraid to use a lot of hairspray either, but also try not to cake it on. If you spray too much in one area, it just starts to make the wig look like plastic. 3. How do I get my ponytail to look right? - If the wig you are using isn't built for a ponytail, as many aren't, you may either need to make your ponytail lower on the wig, or you will need to sew more wefts into the wig in order to cover up the wig cap. You can check out this great Arda Wigs tutorial here. 4. My wig is too big help! - If you are buying a bagged wig, chances are you won't be able to choose the size of wig you are buying, you just have to hope it fits. If you need to make the wig a bit smaller to fit your head, you can trim some of the elastic out of the wig cap and stitch the gap together. But this is definitely something you should do with a tutorial, don't just wing it. Last thing you want is to cut the wig and not be able to fix it! This is the tutorial I would recommend for resizing your wig. You can also size a wig larger if needed, but again, it's best to follow a tutorial. 5. Heat on synthetic fibres? - Synthetic fibre loves heat! But be careful how much heat you use! If you use a heating iron or blow dryer on medium to low setting, the fibres of your wig will become more relaxed and easier to handle and style. DO NOT use a heat gun! I tried this years ago on a wig, and managed to melt the front of it together. Needless to say, it's a bad idea. So stick to hair dryers, curling irons, flat irons and low to medium heat! 6. My wig isn't the right colour, can I dye it? - You can definitely dye a wig! There are a few ways to do it as well. You can use markers like a Sharpie, or you can buy fabric dyes such as Rit. Each of these have different methods to get the colour you want and there are lots of tutorials online to show you how! 7. How do I wash my wig? - This is a tricky one. Cosplay and costume wigs are not made with real human hair, and so if you wash them with regular shampoo, the fibres will deteriorate quickly, or become frizzy, or lose their colour and sheen. It's best to use a synthetic fibre shampoo to keep your wig in good quality for a long time. The only problem with synthetic fibre shampoos are they are either expensive or hard to find. This isn't the typical product you will find at just any drug store or grocery store. You'll need to go to a wig shop or somewhere that sells wefts and wig products most likely. As an alternative, you can use a very mild detergent or soap on your wig. You can use products like sunlight laundry detergent, or very mild shampoos such as suave. I personally have not tried the sunlight or the suave, but I have seen tutorials and blogs that do use these products. Arda Wigs & Kinpatsu Cosplay are my two favourite go-to's when it comes to styling wigs. They have fabulous tutorials, step by step instructions and Kinpatsu's book on wig styling is a must have for any cosplayer!! Good luck on your hair styling endeavours!
0 Comments
Years ago I found this awesome tutorial for how to make a small compact cosplay first aid kit that I can fit in a pocket, and I never leave the house without it! Here's what you need to do:
Get a small plastic container like a pill container. inside put: - a bobbin of thread - small foldable scissors - a button - a piece of velcro - super glue - sewing needle - a couple sewing pins - a few safety pins This covers the basics if you have any issues with your costume while you are out and about. I highly recommend making one of these to take with you, I know it's saved me a few times. Here is how I started out in Cosplay... Soi Fong 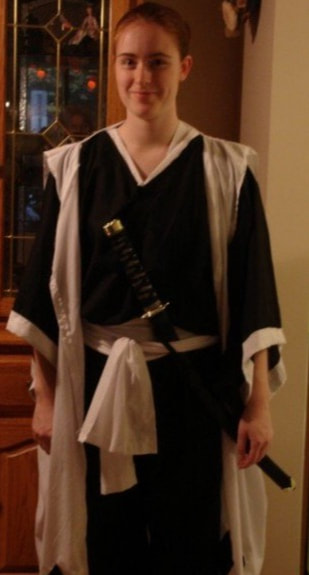 This was the first costume I had ever made. I was still in Highschool and wanted something cool to wear to the local anime convention. At the time I was really into Bleach and wanted to dress up as one of the characters. Now my favourite characters in the anime were all guys and I didn't really have any female characters that I thought were super cool. I chose Soi Fong because she was one of the few Captains in the Soul Society with some kick ass moves and an awesome Zanpakuto (sword). So I thought, why not? I knew nothing about sewing costumes, using sewing patterns, foam work...literally I knew nothing. So I got my Mom's help with picking out some fabric, folding it over my head and marking where I should cut a hole for my head, and pinned where the sleeves should go. Even the pants, I just cut out rectangles and thought...that looks right. Sewed them together, added a drawstring and voila! Pants! For a first time costume I was pretty pleased with myself. It all fit, it was comfortable and it looked the character, overall a win. I even made her zanpakuto in it's final form which was painted craft foam and sat nicely on my hand. I tried to style a wig, but it turned out pretty horrible so I opted not to wear it...ever. If I could go back and do this all again, I would use a proper pattern and finish my edges nicely. Link  This was the costume I wanted to make my whole life! Legend of Zelda has always been my favourite game series and I so badly wanted to dress up as Link. Again at this point I knew nothing about using sewing patterns, so I bought my fabric, pinned the edges around my arms and side, and cut out a head hole. I added small fabric details and such which were all hand sewn on, because I drove my sewing machine like a Ferrari...way to fast...and it would eat fabric. I bought the pants, shirt and boots to match as best as possible, bought a cheap wig and sewed some brown fabric to brown 99 cent gloves. The first sword I had I made with my dad out of wood, and painted it myself. The one in the picture I bought at a convention along with the sword. This was my favourite costume and got me into cosplay. There are so many things I would do differently if I ever re-do this one, like using sewing patterns, making each piece rather than buying and definitely get a better wig. Hexidecimal 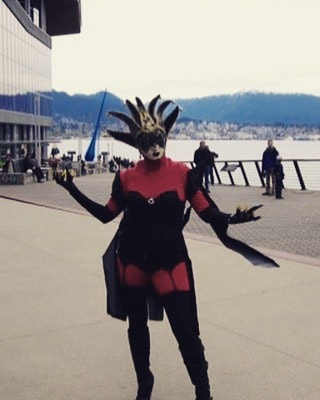 Growing up ReBoot was the cartoon that brought the whole family together. We would sit together in the living room, have dinner and turn it on. It inspired me to get into video games and 3D animation which later in life would lead to my career in Visual Effects. Hexidecimal was always by far my favourite character. I loved how crazy and maniacal she was, but at the same time super sweet, misunderstood and wanting to do the right thing (even if she didn't know how). I found this amazing mask at a Halloween store that looked similar to her and thought, well now I have to officially make her outfit :) I bought everything from dollar stores, halloween stores and thrift stores and pieced it all together. The only thing I made here was the red cowel to cover my head and neck. This one is definitely on my do it again list, and this time it will be 100% from scratch including the mask Zelda 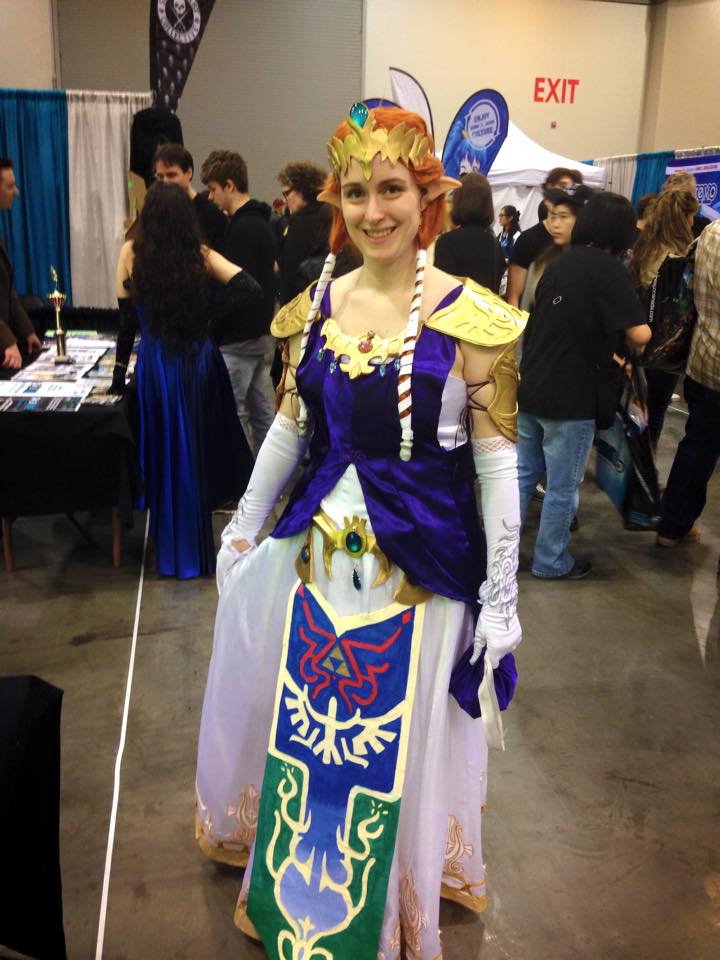 This was the first real challenge I ever faced in cosplay. This costume had so many firsts. The first time I used sewing patterns, the first time I painted fabric, made foam armor, made my own sewing pattern, used appliques. I had zero real sewing experience and so I picked out a sewing pattern for the dress and started cutting out the pieces, adding in extra seam allowance, and piecing them together the way I thought they should go rather than they way they were meant to go. I ended up getting help from the costume designer on the show I was working on at the time. She taught me how to read sewing patterns and had me go home every night and work on the dress until I got each bit correct. It was a lot of fun and I'm super grateful for it today! I was really happy how this costume turned out and how easy it was to wear around a convention. If I were to make this one again I would use worbla rather than foam for the armour, use actual fabric paint on the talberd, and make a new vest with a proper sewing pattern. Aerith 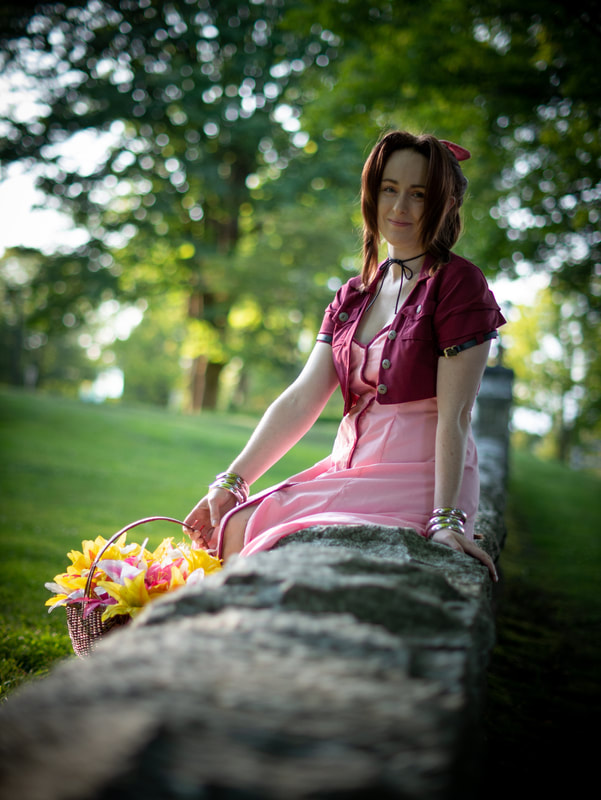 When I started working on Aerith I finally had a bit of sewing instruction under my belt. I was able to follow the sewing patterns I picked out and even alter the jacket a bit to add a collar, pockets and belts on the sleeves. The wig was the hardest part for me, as it was the first time I had to style a wig. I knew I needed heat and lots of hairspray, but I had no idea that there was such a thing as too much heat. This led to me melting the front of the wig.
Since the debut of this costume I have had to style two more wigs for it. Both didn't turn out the way I wanted them to either being super heavy or not fitting right. I love how comfortable this costume is and how easy it is to look after. If I were to make it again I would order a pre-styled wig and make the bracelets from foam. Whether you are new to cosplay or a seasoned cosplayer you'll definitely have you preference of where your costumes come from. So is it a better idea to buy a costume? Or is it better to make one?
I personally feel that taking the time to make your costume makes the whole cosplay experience that much more fun, but you might find you get more enjoyment from buying a costume. Here are some pros and cons to consider when buying or making your costume. Buying a costume: - Price Buying a costume can be super pricy. Depending on the character you want you could be spending upwards of a couple hundred dollars. - Quality Even if you do pay a lot for your costume, the quality may not be that great. I have found that most pre-made costumes are put together with cheap fabric and thread in order to keep manufacturing costs down, but they make money by hiking up the purchase price. So your costume may not last very long. - Fit Bag costumes are a one size fits all kind of deal, so it's never going to look as good on you, as it does in the photo. If you have the skills and are able to alter the costume to fit you, then you'll get that photo ready look you want. - Detail Bagged costumes and pre-made costumes don't usually have a lot of detail to them, or the details will be printed onto the fabric so you lose out on texture and that 3D effect. Making a costume: - Price While making a costume can be just as expensive as buying a costume, you can make things on a budget. Some cosplayers are able to find all the materials they need right out of a dollar store. Finding sales on craft supplies and fabrics definitely can help you save a few pennies on your costume. - Quality You are in control of the quality, so this way you'll know if your costume is made to last a long time or if it's meant only for one day. - Fit The costume is made specifically to fit you, so you'll always have that photo ready look! You'll also be more comfortable for long periods of time. - Detail You can make your costume as detailed or as simple as you want. Overall, you have a lot more control over how your costume looks and feels. - Time intensive If you're not a full time costume maker, making your own costume can be very time intensive. I've had a few costumes that I've worked on every night for close to a year just to get them done. - Learning curve Making your own costumes also means that there will be skills you need to learn! Whether it be sewing techniques or how to use foam properly, there is always something to learn. Over all there are good things and bad things about buying and making costumes, so you need to pick what is right for you! And remember, just because you buy a costume, or have someone else make the costume for you doesn't mean you aren't a cosplayer! You're the one representing your fandom and showing your love in the best way you know how!! Now get out there and show 'em what you got! Cosplay is great for everyone, but can also seem overwhelming when you are just starting out. So...where should you start?
For your first costume, try to pick something that is within your skill level and something you are comfortable with. Don't think "oh I need to learn all new skills if I want to make this", it's absolutely not true. You don't need to know how to sew, or work with foam, or even be super artsy or creative. You've got your concept art, and all you need to do to start is get a few pieces of clothing. Start by going to thrift stores! You can find lots of great things here to incorporate into your cosplay. I especially find that going to Value Village around Halloween is the best time. You can find costumes to re-purpose as well as articles of clothing, shoes and accessories. This is also a good time of year to pick up make-up, wigs and any false nails or prosthetics you might want. Making a costume from scratch can be a lot of work, from sewing to forming foam, painting and heat setting Worbla. Grab a friend who is familiar with the techniques you need help with! Having friends and family members help is a great way to have fun and learn from others. Just because you see a really cool detailed cosplay doesn't mean you should jump right into it as a first project. It's ok to challenge yourself a little, but be sure to pick something that won't overwhelm you when first starting out. If making a costume doesn't really seem like a great idea for you as a first costume, you can also buy one! There is nothing wrong with buying a costume to wear to a convention or party. This is actually a great way to get you into cosplay and get you comfortable and familiar with the community! Halloween is the best time to go to stores to buy costumes, but you can also visit costume specific stores, and there are lots of cosplay costumes available online! Buying costumes can be a little pricy though, so make sure to find something that fits in your budget! Now get out there and have fun! I'm sure right now you are thinking WOW this is going to be super complicated, but there are lots of ways to make a sewing pattern for your costume without having to know all the proper measurements or any tailoring skills. We will cover how to revise an existing pattern, how to make a simple fitted pattern using tissue paper and tape and we will also touch on how to make a professional pattern.
Revising an existing pattern: If you're comfortable using existing sewing patterns then this could definitely be a good way to make yourself a new pattern. This is how I have been making my Evie Frye jacket! Find a pattern that is similar to the item you want to make. Only using the major pieces of the pattern (back, front, sleeves etc) cut them out of scrap fabric and sew them together as a draft. From here you can draw new lines on your draft for the new seams you want. Cut it all out, trace the new pattern pieces onto paper and add your seam allowances. Make sure to take your new pattern pieces and sew them together as a draft to make sure that your new pattern works! Making patterns from tape: This is one thing I would love to figure out how to do! Making patterns from tape for armour is relatively straight forward, but I've seen some cosplayer's making sewing patterns from tape which completely amazes me! Essentially you need to wrap whichever body part or a shoe in plastic wrap and then cover in masking tape or duct tape (I find masking tape easier to mark and cut), draw your pattern on top to the tape and then cut it off what ever you have wrapped it on (but please be careful!). Once the tape is removed from your arm/leg etc you can cut out the pattern and use this to transfer to foam or fabric. When transferring to fabric make sure to add seam allowances ex 1" to each side you are sewing. This will allow for a little bit of breathing room. But remember, this pattern is fitted to your bare arm or leg or a shoe so there is no wiggle room. You'd have to add more than an inch to each sewing edge if you want it to fit loosely. Making a moulage: A Moulage is a much more complicated route and I wouldn't suggest this for beginners. This is where you take all your body measurements, transfer them to paper and do multiple calculations in order to make a fitted pattern. You can tutorials on this online on My Bluprint, or through professional sewing courses. Make patterns from existing clothing: You can make patterns from your existing clothing without even taking the clothes apart. You can trace out pieces by folding the clothing piece you want along the seam lines. Here is a great tutorial by Professor Pincushion on how to do this! I hope you found this overview helpful! In the future I can do full tutorials on how to make your own patterns! Let me know in the comments section if you would find that helpful! Here is just a simple overview of how to best measure yourself for a sewing pattern, or to make your own!
Neck: Wrap the measuring tape around your neck at the base. It shouldn't be super tight around your neck or too loose, but should sit comfortably around your neck. Measure to the small divot between your collar bones to get your neck circumference. This is useful when measuring for dress shirts and collars. Bust: Wrap the measuring tape around the centre of your chest. Make sure the measuring tape stays level all the way around. If you are measuring for a pattern this method will work just fine. If you are measuring for a moulage, or a base pattern that you are designing, make sure to press the measuring tape to your sternum in between the breasts. Waist: Wrap the measuring tape around your mid section 1/4" above the belly button. Make sure that your measuring tape is level all the way around. To make this easier, you can tie a 1/4" elastic around your waist 1/4" above the belly button. The measuring tape will relax into your natural waistline. If you do the elastic method overtop of a tank top or tight fitting shirt, be sure to adjust as necessary as the elastic will inch upwards. Hips: If you are measuring your hips for an existing sewing pattern, you want to wrap the measuring tape around the widest section of your hip area, usually the fullest part of your bum. If you are measuring to make a pattern you will want to measure both your high hip and low hip. Your high hip is 4 1/2" below your waist line. The low hip is 8 1/2" below your waist line. Armhole: Wrap the measuring tape around the top of your arm directly through the centre of the arm pit. Since I have a photoshoot coming up this weekend I thought this would be a great chance to talk about things you can do to prep for your own photoshoot!
This weekend I'll be taking my Aerith cosplay out for photos, and possibly my Sailor Jupiter so that means this week I've been updating wigs & props, checking for any maintenance quick fixes, and doing an inventory of all the things I need to take with me. So here's what I've got planned, and you can use this as a guideline for getting your own photoshoot prepped. 1. Grab a friend! - your photographer or handler or both! 2. Make sure your costume pieces are all together 3. Check for fixes 3a. Take a cosplay emergency kit (just in case) 4. Choose your location 5. Pack any photography gear you need (if you are taking it) 6. Check the weather forecast! 7. Have fun! This week I am making new bracelets for Aerith as well as styling her wig, and if time permits I'll style a wig for Sailor Jupiter as well. I've gone over my costumes and made sure there are no rips and frays so we are good to go there, and of course...everything still fits! It's going to be nice and warm and sunny this weekend and we are going to go over to Deer Lake Park to take advantage of the great scenery. We will be packing lots of water and some snacks, as well as sunscreen! I've got my camera charging and picked out which lenses I want to take. By Friday night they will all be in a back pack and ready to go! I hope that the above list helps you get ready for your own photoshoot, and be sure to stay tuned for new photos coming soon! You've made your super cool costume, you're really proud of it and you go and do an awesome photoshoot! But how do you make your photos that much better?? With photo editing you can do a wide array of things from making your photos sharper and crisper, adjusting the colour, painting out blemishes or even going as far to completely change out the background! There are plenty of tools available for doing this, but the most common one you will hear of is Adobe's Photoshop and Lightroom. You can also use programs like Affinity Photo, or my favourite (and definitely the least conventional) Nuke. I've had plenty years experience using photoshop, but never to actually edit photos. This is something I want to get better at. I'm learning Affinity photo right now as well, which does all the same things as Photoshop but for a fraction of the cost. The reason my tool of choice is Nuke is because of my years of experience doing compositing for film. In Film and TV you need to know how to adjust colour on elements you are adding to your shot, how to roto around characters and objects to replace backgrounds, and also how to work with different formats and resolutions. This is not the tool I would recommend to a beginner for photo editing, I just find it easier since it's a tool I already use daily. There are SO many books, websites and tutorials that teach you how to do photo editing. I highly recommend looking up some youtube tutorials before you dive in. Try to get some ideas of what you want to do with your photos and watch some videos on how to do that. I just recently bought Kamui Cosplay's book on photography and photo editing for cosplay and I have to say it is by far my favourite reference. She has so many great tips on what to look for in your software, what things you should try changing first on your photo like white balance, brightness and contrast. Well worth a look! I hope this has helped spark some interest for you on editing your photos! 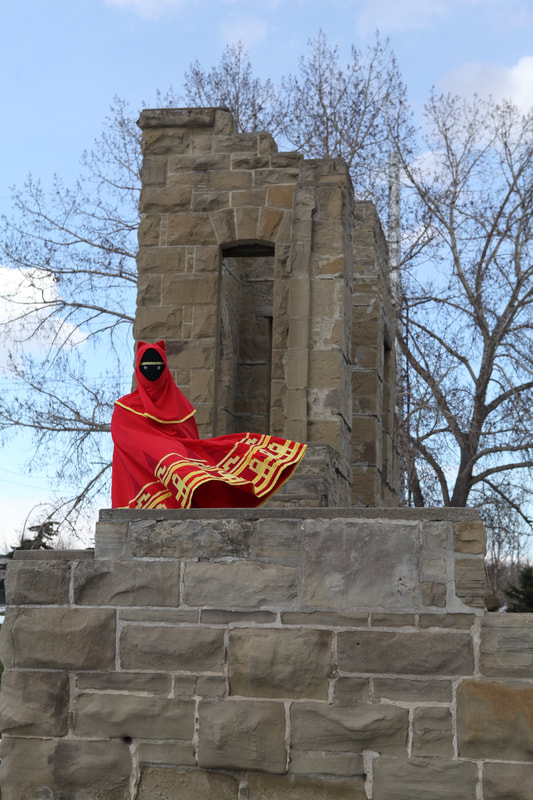 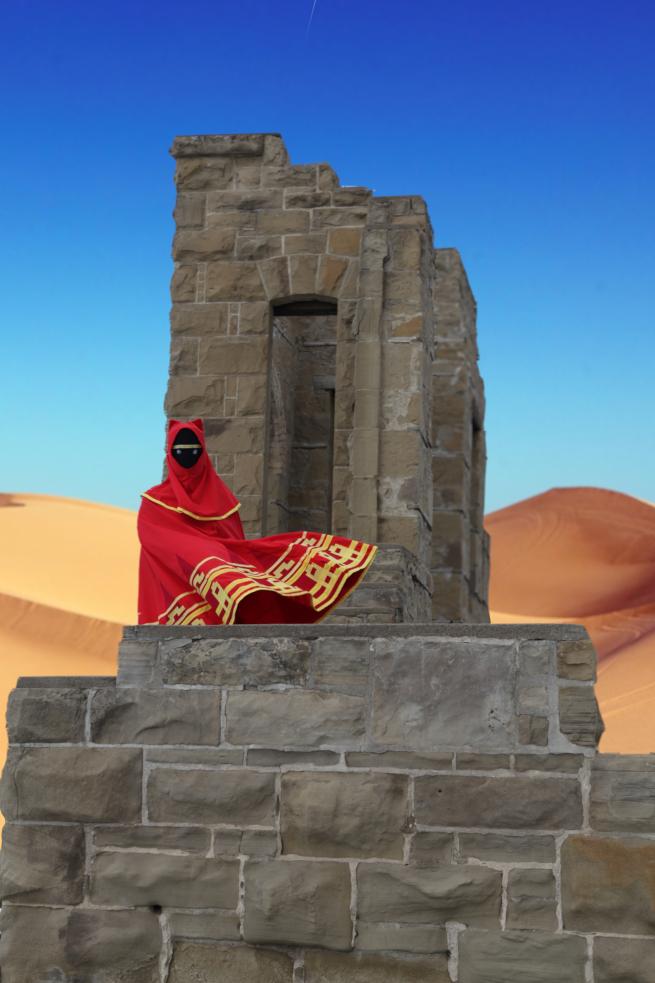 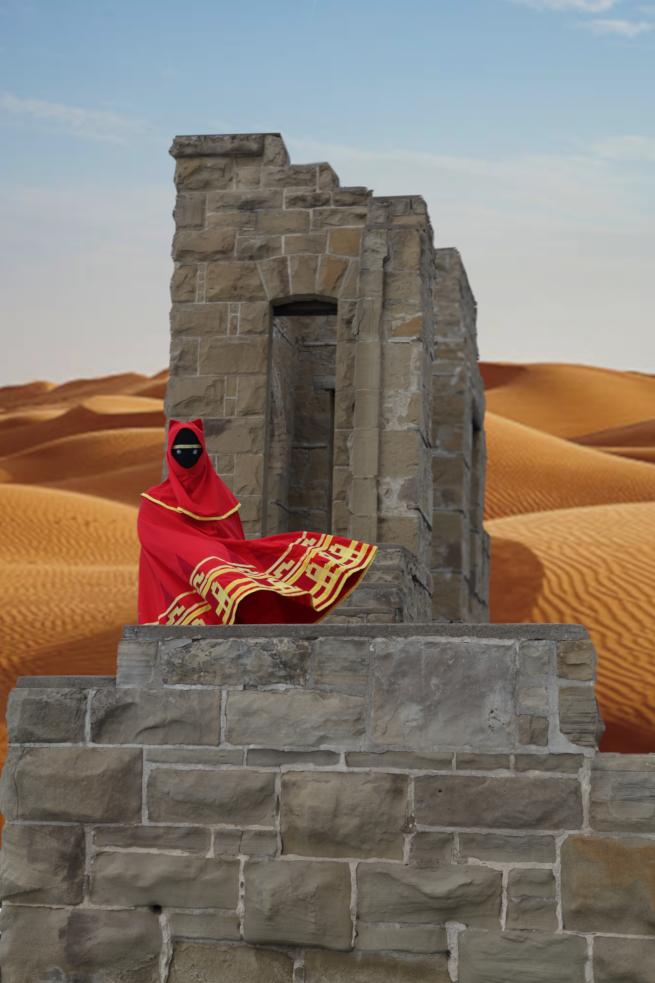 This week I've put together a list of some of the different crafting materials you might find and use for your costume! Most of these can be found at your local crafting and fabric stores, others you can find on cosplaysupplies.com
Worbla By no means am I the expert on worbla, I'm learning slowly myself on this topic! There are a few different types of worbla you can get and each of them have their merits and demerits. Worbla is a thermoplastic which means you can mold it with heat. It's great for suits of armor, weapons and accessories! It makes your cosplay much more durable and even more realistic! You can find a full list and everything you could want to know about worbla at worbla.com. Worbla isn't the only kind of thermoplastic out there, but probably the most well known and readily available. Some other thermoplastics you might find are Thibra, Wonderflex, Fosshape, Varaform, Styrene and Sintra. Craft Foam Craft foam is super easy to use, cheap and accessible, plus comes in all different thicknesses. If you are making your first ever armor or accessory for your costume, this is definitely a good place to start. Craft foam is super easy to use, to cut out and forms well with or without heat (just make sure you don't use too much heat and melt it!) EVA Foam EVA stands for Ethylene-Vinyl Acetate. This is a type of cell foam. It is super durable, easy to heat mold and sculpt and also pretty easy to find. Most people would recognize EVA foam as those foam mats on the floor of a kids play room. You can find sheets in packs of 4 from Canadian Tire, Walmart and other department stores. You can also order it in rolls and sheets from online. This is another great material for making the base of an armor set or a weapon. It also plays really nice with Worbla and other thermoplastics. It's easy to sand and paint, and is comfortable to wear. Foam Clay This is a new and exiting crafting material. I have a jar at home that I can't wait to start using! This starts out like a putty that you can mold and shape and adhere to itself. It's great for making intricate details on armor, belt buckles, accessories and weapons. Once you let it air dry it hardens to a high density foam which is easy to sand and paint. This product is harder to find for now since it is new to the crafting and cosplay market but you can find it here on arda wigs Fabrics I could honestly do an entire blog post just about the different types of fabric, so we're going to do the condensed version here! When you go out shopping for your cosplay project, make sure you are using the right type of fabric. What I mean is, if you need something stretchy, don't use a cotton or a stiff fabric, go look for a nylon or a spandex. If you are making a dress definitely go for the more shiny and slippery fabrics (if you're needing to be elegant or regal) like Satin, Shantung or Taffeta. Cottons and broadcloth are also a great option for most articles of clothing because they are stiffer, easy to sew and cut and easy to clean. Thread If you're going to be sewing, you are going to need that perfect matching thread to go with your fabrics. There are many different kinds of threads just as there are fabrics, but threads are a little easier to pick out. Generally I say stick with an all purpose polyester thread. These are readily available in a multitude of colours, relatively cheap at $2 a spool (cheaper if you can find a sale) and for many projects, you probably won't need more than the smallest spool of 110yds. I would recommend going with a brand you trust as well since not all threads are created equal. Whenever I do my sewing I stick with Gütermann thread. They've been around forever and you know that once you thread your machine, the thread isn't going to snap every five minutes. Coats is another good company to look for. Your thread will also differ if you are using a serger VS a sewing machine, but again, try to stick with your all purpose thread rather than 100% silk or rayon etc. Glues Depend on what you are making there will be different glues that will work. If you are working with EVA or craft foam, I would recommend using contact cement or E6000 glue, even spray adhesive will work great with these foams. If you are using fabric, you can use the E6000 or specialty fabric glues. Just keep in mind how much weight that glue is going to need to hold. I find some fabric glues don't work that great with multiple layers or heavier fabrics such as leather, they tend to peel apart quite easily. If you are going to be glue fabric together, I would recommend using products like Steam-A-Seam or HeatnBond which are iron on adhesives. Hot glue would be my last glue of choice. It is readily available, but it can melt your foam, ruin your fabric and also lose it's adhesion over time. When you are using materials such as hard round plastics, silk flowers, or rough textures, this is where I would trust your hot glue to work the best! Think outside the box... When you are working on your next costume, also try to think of all the things you could use to make your costume that much more realistic or special, think of things you may not have used before. When I made my Skull Kid cosplay I wanted the leaves on his hat and gloves to look a particular way. I couldn't find any silk plants that would really work so I thought..."Corn husks". Instead of shucking hundreds of ears of corn, I did some digging on the internet and found you could buy bags of Tamale wrappers (dried out corn husks) which would work perfectly! I also found rafia which is a wrapping material used by florists that I used on my belts. So what kind of materials could you use to make your character come to life? I hope this guide helps you get started on your next costume! |
Archives
April 2020
Categories
All
|
 RSS Feed
