|
Cosplay is great for everyone, but can also seem overwhelming when you are just starting out. So...where should you start?
For your first costume, try to pick something that is within your skill level and something you are comfortable with. Don't think "oh I need to learn all new skills if I want to make this", it's absolutely not true. You don't need to know how to sew, or work with foam, or even be super artsy or creative. You've got your concept art, and all you need to do to start is get a few pieces of clothing. Start by going to thrift stores! You can find lots of great things here to incorporate into your cosplay. I especially find that going to Value Village around Halloween is the best time. You can find costumes to re-purpose as well as articles of clothing, shoes and accessories. This is also a good time of year to pick up make-up, wigs and any false nails or prosthetics you might want. Making a costume from scratch can be a lot of work, from sewing to forming foam, painting and heat setting Worbla. Grab a friend who is familiar with the techniques you need help with! Having friends and family members help is a great way to have fun and learn from others. Just because you see a really cool detailed cosplay doesn't mean you should jump right into it as a first project. It's ok to challenge yourself a little, but be sure to pick something that won't overwhelm you when first starting out. If making a costume doesn't really seem like a great idea for you as a first costume, you can also buy one! There is nothing wrong with buying a costume to wear to a convention or party. This is actually a great way to get you into cosplay and get you comfortable and familiar with the community! Halloween is the best time to go to stores to buy costumes, but you can also visit costume specific stores, and there are lots of cosplay costumes available online! Buying costumes can be a little pricy though, so make sure to find something that fits in your budget! Now get out there and have fun!
0 Comments
This has got to be one of the best resources I have found if you want to enhance your crafting skills.
They have videos by professionals in sewing, quilting, cooking, knitting, painting etc. The website started out as Craftsy.com and has since migrated to MyBluprint.com. They offer a subscription service for $10 a month and also have a library of videos that you can buy outright to keep forever. These are usually about $50-60. There are benefits to both the subscription and purchasing classes. Classes come with materials. In a lot of cases it is a PDF that covers what is happening in the class, but with the classes for purchase they come with sewing patterns, sometimes fabric or tools etc. I have found this website super useful to upgrade my sewing skills. A few years ago I needed to know how to change the size of a pattern for a commission. The pattern I owned was too small and I needed to up size it. I took a class on grading, and now grade patterns all the time! I'm also currently taking classes in designing my own patterns from scratch! Anyone looking for more knowledge in their craft you should definitely check out this site! UPDATE - My Blueprint has now gone back to being called Craftsy. I'm sure right now you are thinking WOW this is going to be super complicated, but there are lots of ways to make a sewing pattern for your costume without having to know all the proper measurements or any tailoring skills. We will cover how to revise an existing pattern, how to make a simple fitted pattern using tissue paper and tape and we will also touch on how to make a professional pattern.
Revising an existing pattern: If you're comfortable using existing sewing patterns then this could definitely be a good way to make yourself a new pattern. This is how I have been making my Evie Frye jacket! Find a pattern that is similar to the item you want to make. Only using the major pieces of the pattern (back, front, sleeves etc) cut them out of scrap fabric and sew them together as a draft. From here you can draw new lines on your draft for the new seams you want. Cut it all out, trace the new pattern pieces onto paper and add your seam allowances. Make sure to take your new pattern pieces and sew them together as a draft to make sure that your new pattern works! Making patterns from tape: This is one thing I would love to figure out how to do! Making patterns from tape for armour is relatively straight forward, but I've seen some cosplayer's making sewing patterns from tape which completely amazes me! Essentially you need to wrap whichever body part or a shoe in plastic wrap and then cover in masking tape or duct tape (I find masking tape easier to mark and cut), draw your pattern on top to the tape and then cut it off what ever you have wrapped it on (but please be careful!). Once the tape is removed from your arm/leg etc you can cut out the pattern and use this to transfer to foam or fabric. When transferring to fabric make sure to add seam allowances ex 1" to each side you are sewing. This will allow for a little bit of breathing room. But remember, this pattern is fitted to your bare arm or leg or a shoe so there is no wiggle room. You'd have to add more than an inch to each sewing edge if you want it to fit loosely. Making a moulage: A Moulage is a much more complicated route and I wouldn't suggest this for beginners. This is where you take all your body measurements, transfer them to paper and do multiple calculations in order to make a fitted pattern. You can tutorials on this online on My Bluprint, or through professional sewing courses. Make patterns from existing clothing: You can make patterns from your existing clothing without even taking the clothes apart. You can trace out pieces by folding the clothing piece you want along the seam lines. Here is a great tutorial by Professor Pincushion on how to do this! I hope you found this overview helpful! In the future I can do full tutorials on how to make your own patterns! Let me know in the comments section if you would find that helpful! Here is just a simple overview of how to best measure yourself for a sewing pattern, or to make your own!
Neck: Wrap the measuring tape around your neck at the base. It shouldn't be super tight around your neck or too loose, but should sit comfortably around your neck. Measure to the small divot between your collar bones to get your neck circumference. This is useful when measuring for dress shirts and collars. Bust: Wrap the measuring tape around the centre of your chest. Make sure the measuring tape stays level all the way around. If you are measuring for a pattern this method will work just fine. If you are measuring for a moulage, or a base pattern that you are designing, make sure to press the measuring tape to your sternum in between the breasts. Waist: Wrap the measuring tape around your mid section 1/4" above the belly button. Make sure that your measuring tape is level all the way around. To make this easier, you can tie a 1/4" elastic around your waist 1/4" above the belly button. The measuring tape will relax into your natural waistline. If you do the elastic method overtop of a tank top or tight fitting shirt, be sure to adjust as necessary as the elastic will inch upwards. Hips: If you are measuring your hips for an existing sewing pattern, you want to wrap the measuring tape around the widest section of your hip area, usually the fullest part of your bum. If you are measuring to make a pattern you will want to measure both your high hip and low hip. Your high hip is 4 1/2" below your waist line. The low hip is 8 1/2" below your waist line. Armhole: Wrap the measuring tape around the top of your arm directly through the centre of the arm pit. I recently watched a special on Entertainment Tonight Canada talking about Cosplay and how a lot of cosplays you see online and in person are super sexy, showing lots of skin, or barely wearing anything. I thought this would be a good topic to cover.
It's true that the images you see of sexy cosplays get a lot of likes on instagram, facebook, twitter etc. but does that mean that it's the only way to get noticed in the cosplay community? Absolutely not. There are lots of well known cosplayers that cover up. You can get likes and followers for having good craftsmanship too. It's all about how you market yourself and who your target audience is, but that's a whole other discussion. Since there are other ways of getting seen in the cosplay community rather than being sexy, does that mean you should avoid doing a sexy cosplay? Again, nope. This is all up to you and what you are comfortable with. Some people find that doing a sexy cosplay makes them feel good, empowered. Cosplay is about the fandom, what you enjoy and what you want to express to the community. With doing sexy cosplay comes a lot of new territory as well, not all of that is positive or welcomed. You need to understand that people will make comments about your outfit, your body, comments like "that's not a cosplay", and you have to be comfortable dealing with that. For myself personally, I have never done a sexy cosplay, and most likely won't. It's not that I don't want to, but it's not something I am super comfortable with. I prefer to choose costumes that will challenge my crafting skills and impress people with how much detail and work is put into the costume. Now, some cosplayers also take their sexy costumes to a whole other level by doing boudoir shoots, or swim suit renditions of characters. You can see some of these posted to social media, and some cosplayers will also make stuff like this exclusive content for their Patreon tiers. This is definitely not necessary in order to gain followers, it's a choice that specific cosplayer's have made that is right for them. The long and short of it is, Sexy cosplay is an option, it's not necessary to be seen in the community or for popularity. It's all about doing what is right for you. Since I have a photoshoot coming up this weekend I thought this would be a great chance to talk about things you can do to prep for your own photoshoot!
This weekend I'll be taking my Aerith cosplay out for photos, and possibly my Sailor Jupiter so that means this week I've been updating wigs & props, checking for any maintenance quick fixes, and doing an inventory of all the things I need to take with me. So here's what I've got planned, and you can use this as a guideline for getting your own photoshoot prepped. 1. Grab a friend! - your photographer or handler or both! 2. Make sure your costume pieces are all together 3. Check for fixes 3a. Take a cosplay emergency kit (just in case) 4. Choose your location 5. Pack any photography gear you need (if you are taking it) 6. Check the weather forecast! 7. Have fun! This week I am making new bracelets for Aerith as well as styling her wig, and if time permits I'll style a wig for Sailor Jupiter as well. I've gone over my costumes and made sure there are no rips and frays so we are good to go there, and of course...everything still fits! It's going to be nice and warm and sunny this weekend and we are going to go over to Deer Lake Park to take advantage of the great scenery. We will be packing lots of water and some snacks, as well as sunscreen! I've got my camera charging and picked out which lenses I want to take. By Friday night they will all be in a back pack and ready to go! I hope that the above list helps you get ready for your own photoshoot, and be sure to stay tuned for new photos coming soon! You've made your super cool costume, you're really proud of it and you go and do an awesome photoshoot! But how do you make your photos that much better?? With photo editing you can do a wide array of things from making your photos sharper and crisper, adjusting the colour, painting out blemishes or even going as far to completely change out the background! There are plenty of tools available for doing this, but the most common one you will hear of is Adobe's Photoshop and Lightroom. You can also use programs like Affinity Photo, or my favourite (and definitely the least conventional) Nuke. I've had plenty years experience using photoshop, but never to actually edit photos. This is something I want to get better at. I'm learning Affinity photo right now as well, which does all the same things as Photoshop but for a fraction of the cost. The reason my tool of choice is Nuke is because of my years of experience doing compositing for film. In Film and TV you need to know how to adjust colour on elements you are adding to your shot, how to roto around characters and objects to replace backgrounds, and also how to work with different formats and resolutions. This is not the tool I would recommend to a beginner for photo editing, I just find it easier since it's a tool I already use daily. There are SO many books, websites and tutorials that teach you how to do photo editing. I highly recommend looking up some youtube tutorials before you dive in. Try to get some ideas of what you want to do with your photos and watch some videos on how to do that. I just recently bought Kamui Cosplay's book on photography and photo editing for cosplay and I have to say it is by far my favourite reference. She has so many great tips on what to look for in your software, what things you should try changing first on your photo like white balance, brightness and contrast. Well worth a look! I hope this has helped spark some interest for you on editing your photos! 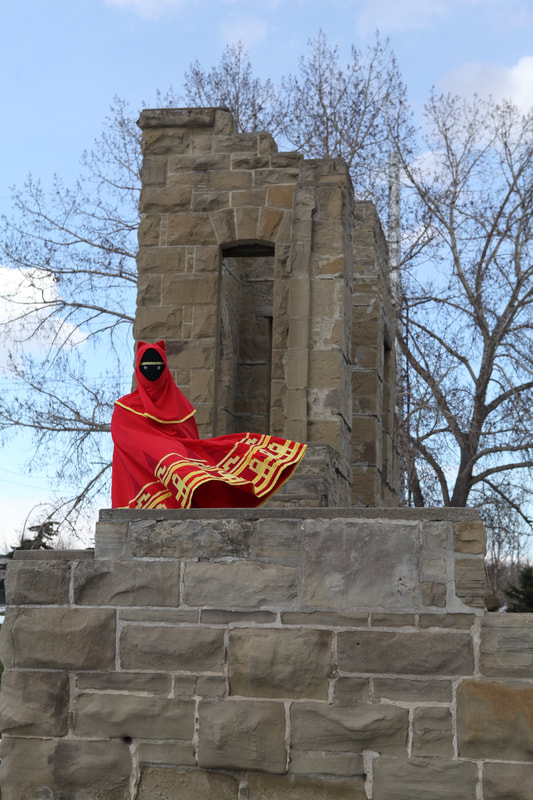 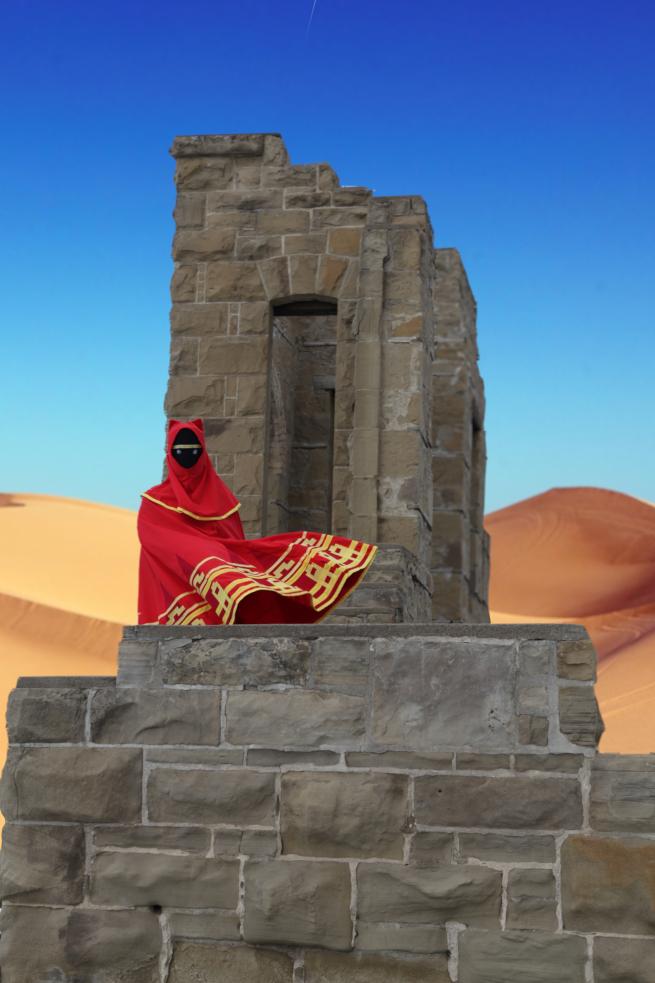 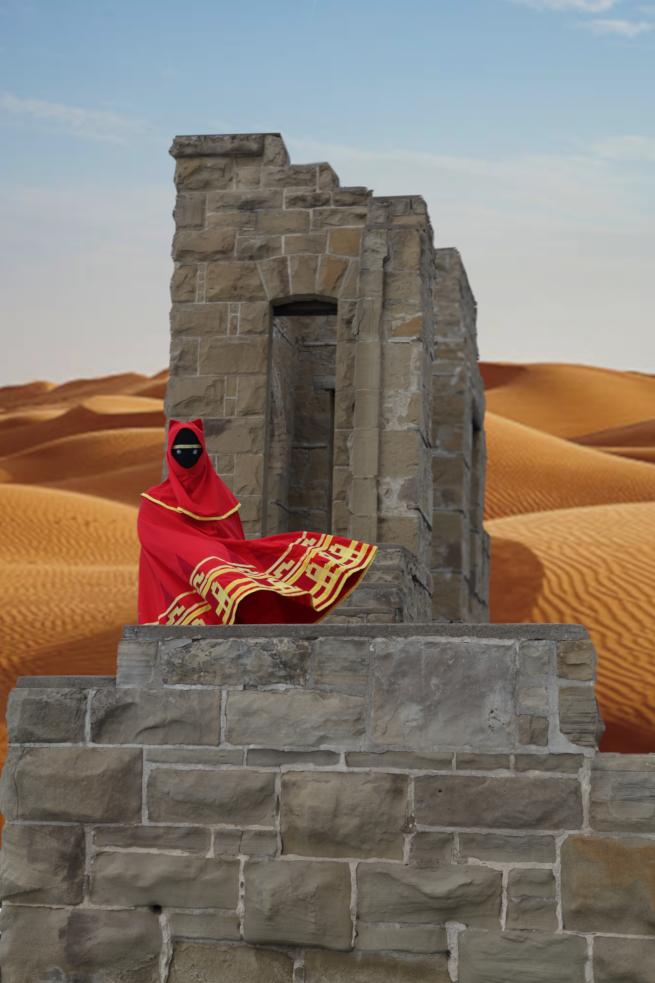 After packing three costumes to take to Calgary Expo with me, I felt this would be a great topic to share with all of you.
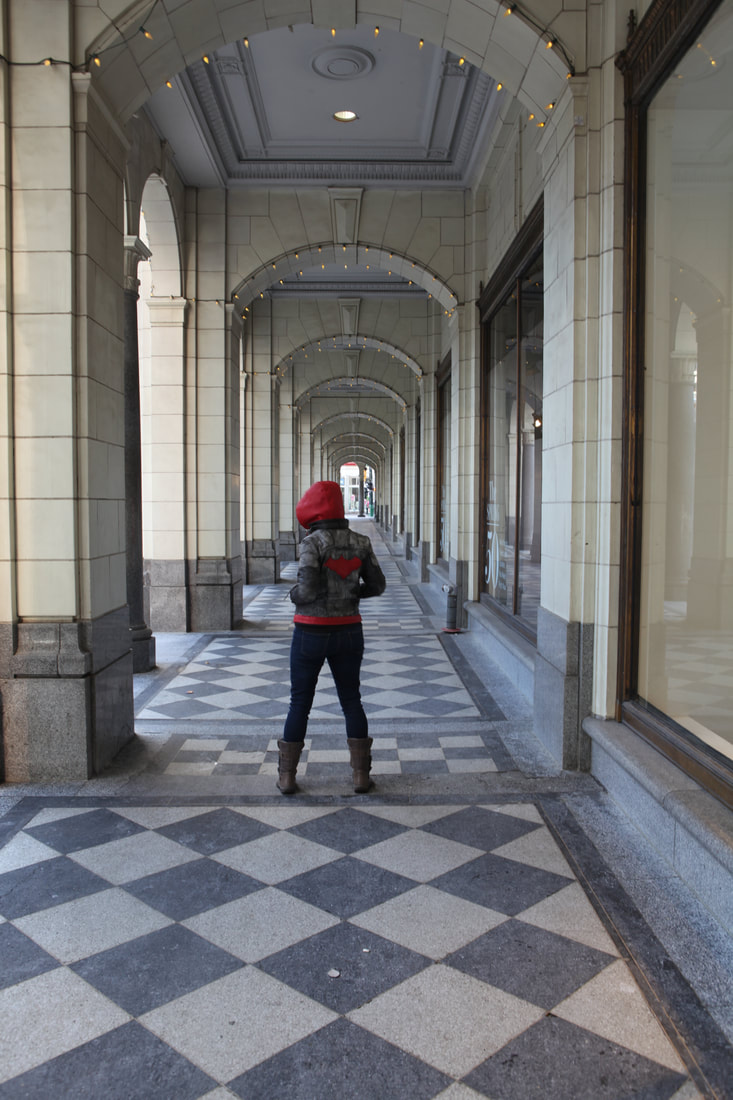
Cosplay's can be large and cumbersome, or super delicate and the last thing you want is to pack up your precious costume, take it on a plane and find out at your destination that it's been destroyed or there are pieces missing. I have seen all sorts of creative ways to get costumes to cons, and from watching other cosplayer's struggle I've come up with a few thoughts on the do's and don'ts of traveling with cosplays. 1. Pack as much as you can in a suitcase or carry-on. No matter if your costume is sewn or if it is foam armor or worbla, if you can fit it in a suitcase, then do so. This is probably the most efficient way to get your costume to a con, and the safest way. If you are taking a mask with you, or foam armor, I would recommend balling up cloth inside of the foam pieces to help it hold it's shape. I find that the more you put in your suitcase, the easier it gets for your armour to squish, which means you have to spend time re-forming it the right shape when you unpack. 2. If it's big, is it worth taking with you? If you have a giant prop that goes with your costume, think really carefully if it is worth taking a plane with you. If it looks like a weapon (foam or not) airlines will not permit you to take it with you in a carry on or checked bag. I highly recommend that if you do have large props that belong with your costume, you may not want to travel with them, or choose a different costume to take with you. One example I can think of is, in an episode of "Heroes of Cosplay" one of the cosplayer's had built a race car to go with her cosplay. They packed it up in a refrigerator box and shipped it through the airline. When the box arrived at their destination, the TSA had opened it up and removed pieces of it as they were deemed unsafe for air travel. So the prop was now useless. Make sure and do your research before you go and take large props, or just leave them at home. 3. Don't go nuts! For my trip to Calgary Fan Expo I packed three costumes in the same suitcase. I was bound and determined to have a different costume for each day of the convention, plus have one day for just wearing casual clothes. Granted, things changed in our plans while in Calgary so I only got to wear two costumes while there. One of them I only wore for a couple of hours, and the other one I removed pieces of it so it was just me dressed steam punk rather than as a character. I felt awful and guilty about not wearing my costumes, not having my wigs styled properly and just not feeling like dressing up. On top of that, we had to pay for the checked bags which would have been an unnecessary cost if I had only taken one costume. So what I'm saying is...It's ok not to pack multiple costumes and just take one with you! Pick what you really want to show off, and something that is comfortable, easy to travel with. You don't need to have multiple costumes for multiple days. Of course, the choice is yours of what you want to bring to a con, but just be sure to pack smartly!! Good luck and have fun! This is definitely a topic I am new to, and I've been trying to get out and take as many photos as possible, as well as learn as much about photography as possible! So this post won't tell you how to be the world's best Cosplay photographer or start your own killer business, but I will definitely share some tips and tricks I have learned through experience, and some great resources you should check out to up your photography game! First off, get yourself a decent camera. Your phone is a great tool for taking quick pics when you are out at a convention, but you probably won't get that star quality photo you've been looking for from your phone camera. This doesn't mean you need to rush out and buy a DSLR, but find your self a decent quality camera that you are comfortable with and work up to the big cameras and multiple lenses. You can get a great point and shoot camera for a decent price and this will get you into the photography game. Next, make yourself familiar with good composition. Whether you decide to take a photography course, watch a tutorial online or read books on the topic, composition is definitely super important to taking great pictures! A few of the simple techniques I would suggest trying and starting off with are rule of thirds and bordering. Examples below of both techniques. - Rule of thirds: Imagine your view finder is split into 3 equal parts. Try making your subject stand in one of those three sections. This will make for super easy and interesting composition! -Bordering: This one is probably one of my favourites, because you can find great borders everywhere! Try looking down a side walk with trees on each side. If you centre your aim and put the trees on either side of your frame, you have a border! Now that you have your composition planned out, it's time to think about lighting your subject. I'm not talking about getting a whole bunch of lights and setting up your home studio, but I guess you could do that too. But first get used to how to use the natural light around you. What's the best time of day to take photos? Where is the sun positioned currently? When shooting outside it's really important to know where the sun is in relation to your subject. You don't want your subject backlit because you won't be able to see their face or those awesome front details. You also won't want your model completely front lit with bright light because you don't want them squinting, and you don't want to wipe out all those details with light that's blow things out. Location, Location, Location! When you're looking for a location to shoot think about the character's background or where the comic/game/anime/tv show takes place. Keep a journal of cool places that you visit that you would want to go back to for a photo shoot. Having this handy will make it a lot easier for future photo shoots. When you do go out shooting, take different landscape photos and architectures photos that you can add to your own personal stock library. This will be super helpful later on when you want to edit your cosplay pictures. There are so many great resources out there on photography and taking photos for cosplay, so do lots of research, get out there and have fun! After doing a few cosplay's the old fashion way, scribbling down notes and saving pictures to my computer desktop, I decided I needed a better tool to keep me organized. I found CosPlanner on the Google Play store and downloaded it to try it out, and naturally when I switched to iPhone, it was the first app I downloaded and installed. This is personally my go to way of organizing now, and I try to keep it up to date as much as possible. I'll list the features, pros and cons and tell you a bit about my overall experience with the app.
There are so many things I enjoy about Cosplanner and not a lot I don't. I love how it keeps all of my in progress work in one neat organized space, so I can see how far I am on each task, write myself notes, tick off items to shop for as I go. Features: - Plan current and future cosplay projects - Keep track of all the things you need to make or buy - Add in photos for reference - Store information on the conventions you will attend - Keep track of your dates - Keep information about the cost - Share cosplay projects between online and mobile platforms - Expandable features through in-app purchase Pros: - Super easy to organize your costumes in progress. - Creates "to do" and "to make" lists - Upload reference and in progress photos - Keep track of the expos and conventions you go to - Lots of sorting options for your projects in progress - Adds new features to completed cosplays Cons: - Start date needs to be the day you create the project file - Allows you to add planned cosplays to your list, but you can only add reference photos. Would be good to have a notes function - Import/export cosplays doesn't work very smoothly between web platform and mobile platform - Unexpected costs that are not listed under "store" - Limited number of items to add before you need to purchase My experience: Overall, I really enjoy using this app, I don't have a lot of bad things to say. It's easy to use, keep things tally'd for you and keeps everything in one place, all neat and organized. The issues I have had is that you need to purchase more "line items" the bigger the project you have. For example I can add 15 items to my "to buy" list and then I need to buy more list spaces. It's not a huge problem as it's a one time purchase for the whole app, it's just slightly annoying. You have to do the same if you are using the web version. Purchases don't stick around cross platform. Personally I would love it to be a purchase per account rather than per application, but they have to make their money somehow! Everything else is fabulous :) Keeps me organized, keeps me on track and makes you feel good seeing your progress bar climb! User friendly: Yes Cost: Fair Functionality: Good Cross Platform: Could be better Aesthetic: Easy to use and understand Overall I would recommend this app to anyone starting a cosplay or other crafting projects for that matter! It keeps everything in a neat and organized place for you to come back to anytime you need! |
Archives
April 2020
Categories
All
|
 RSS Feed
