Why I chose to make this costume:
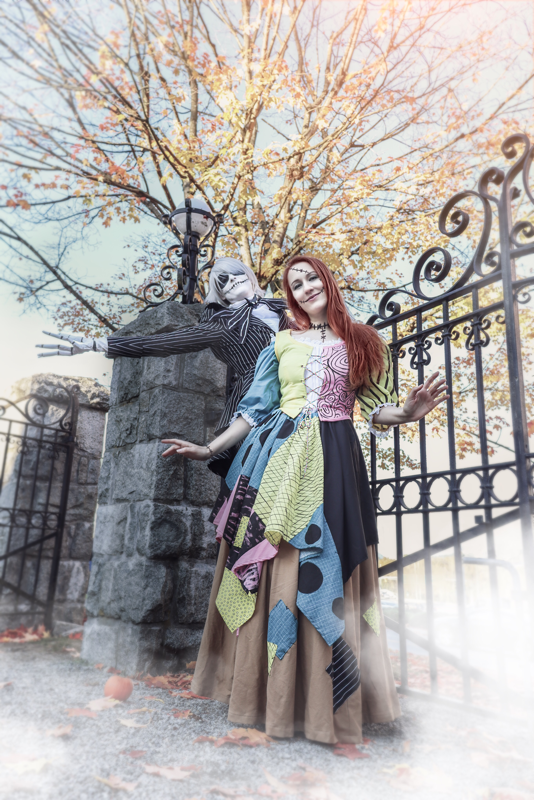
Nightmare Before Christmas has been my favourite movie from as far back as I can remember. I knew that one day I would end up making a Jack cosplay, Sally cosplay or both. And here we are. I had mentioned to my sister that I was finally making a Jack cosplay for myself to wear at Halloween this year, and her first response was “Can I be your Sally?”, naturally, the answer was YES.
This movie was one of the things that brought my sister and I together all those years ago when we met in College. Our love for Nightmare Before Christmas just keeps coming back and bringing us closer.
How I made this costume:
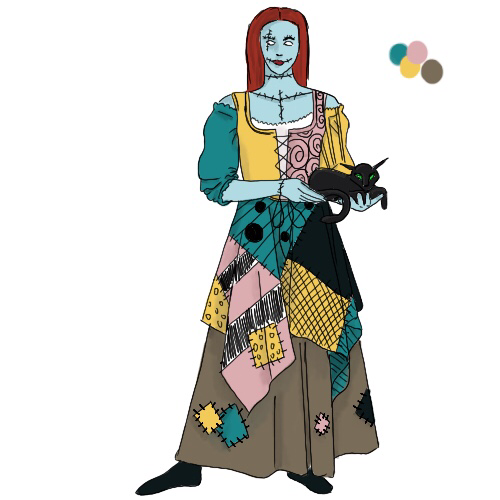
This costume took a few extra steps than I normally take, but since I’m not the one wearing it, it’s extremely important that the person who is wearing it, needs to be comfortable, especially when they have sensory issues. The first step was how do we want to portray Sally? Is this classic dress sally? What era should she be from? What will it look like with Jack in photos? After going through some pattern options and styles, my sister and I both agreed on a more “peasant girl” kind of feel. Looser clothing, off the shoulder, but still some structure. We chose a simplicity pattern (5582 costume C), got her measurements and then went shopping for fabric. The best part of this costume was that it wanted mid to light weight fabrics such as cotton. Cotton is easy to work with and also has a texture that wouldn’t bother her for long wear time. We went to the fabric store and got to feel all different fabrics and my sister approved each one that we bought.
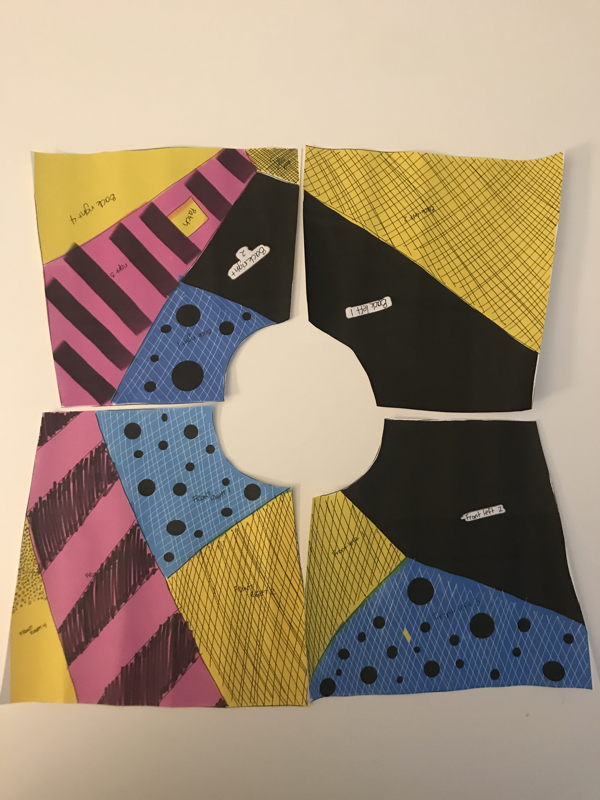
After cutting out the pattern pieces, I took the over skirt pattern and vest pattern and made my alterations. For the vest, I took the back piece and cut it in half on a diagonal in order to get the look of the back of Sally’s dress. For the overskirt, I took this pattern piece and traced out 4. Each quadrant was then split into different patch work pieces to mimic the base of Sally’s dress. All of the patches and colours were laid out and matched up to Sally to make sure the costume was 100% recognizable.
Next I took all of the patchwork pieces and hand painted the different patterns from Sally’s dress using Permaset Aqua. Heat setting the paint once it had dried. I wanted to give Sally a “handmade look” so I made sure that none of my painting was perfect. The brush strokes were messy, the hatch pattern wasn’t perfectly straight. But of course for the patterns that did need precision I either used a stencil to outline where I needed to paint, or used painter’s tape to outline the area.
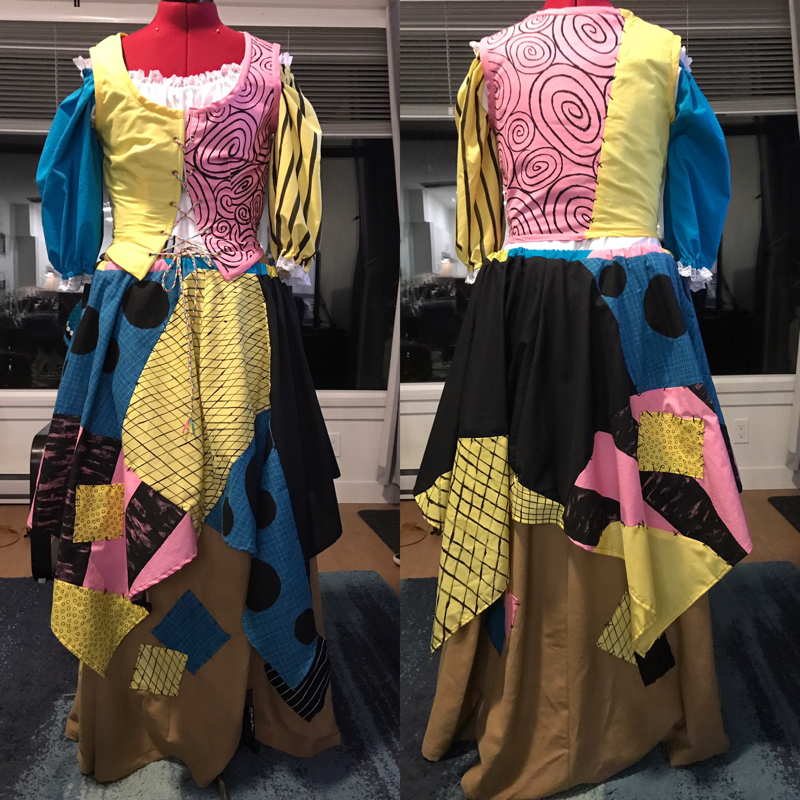
I started with sewing the overskirt since I knew this would be the most amount of work. I pieced together each quadrant, sewing the different patches together, and then once the two front pieces were completed, I sewed down the middle seam, repeating the same steps for the back pieces.
For the main skirt and the blouse, I followed directly along with the pattern instructions, making any small tweaks along the way that I thought were necessary.
Once each piece of the costume was made, I then went back and hand stitched all of Sally’s patchwork stitching along the seam lines to make it look more hand made. I used strands of embroidery thread to make the stitches nice and thick, which also gives it a great tactile feeling.
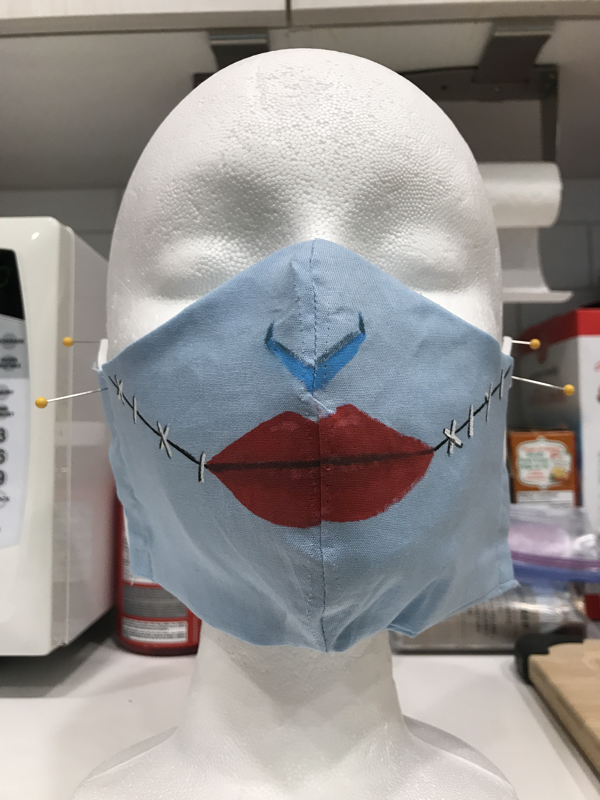
As a finishing touch, and to stay safe in Covid times for photoshoots / future conventions I also made a fabric face mask of Sally’s mouth and nose.
Thoughts on this costume:
I don’t normally say yes to making costumes for other people, but this was a no-brainer. It was so much fun getting to work together with my sister to make this costume something she would love to wear over and over again. When she saw the completed costume for the first time, she was absolutely thrilled. This was the best reaction I could ever have hoped for, She was SO EXCITED! I was thrilled :)
This costume turned out beautifully. I’ve always loved to make costumes that challenge me, and this definitely did that. With having to alter the different pattern pieces so much and make sure that all the painting and stitching details were just right, even adding in a little easter egg that only true fans of the movie will pick out. Overall, this was a great experience, and so much fun to make. I would definitely make this costume again, or make another version of Sally some day :)
Awards:
2nd place in Fabricland West’s Homemade Halloween Contest!
Nightmare Before Christmas has been my favourite movie from as far back as I can remember. I knew that one day I would end up making a Jack cosplay, Sally cosplay or both. And here we are. I had mentioned to my sister that I was finally making a Jack cosplay for myself to wear at Halloween this year, and her first response was “Can I be your Sally?”, naturally, the answer was YES.
This movie was one of the things that brought my sister and I together all those years ago when we met in College. Our love for Nightmare Before Christmas just keeps coming back and bringing us closer.
How I made this costume:
This costume took a few extra steps than I normally take, but since I’m not the one wearing it, it’s extremely important that the person who is wearing it, needs to be comfortable, especially when they have sensory issues. The first step was how do we want to portray Sally? Is this classic dress sally? What era should she be from? What will it look like with Jack in photos? After going through some pattern options and styles, my sister and I both agreed on a more “peasant girl” kind of feel. Looser clothing, off the shoulder, but still some structure. We chose a simplicity pattern (5582 costume C), got her measurements and then went shopping for fabric. The best part of this costume was that it wanted mid to light weight fabrics such as cotton. Cotton is easy to work with and also has a texture that wouldn’t bother her for long wear time. We went to the fabric store and got to feel all different fabrics and my sister approved each one that we bought.
After cutting out the pattern pieces, I took the over skirt pattern and vest pattern and made my alterations. For the vest, I took the back piece and cut it in half on a diagonal in order to get the look of the back of Sally’s dress. For the overskirt, I took this pattern piece and traced out 4. Each quadrant was then split into different patch work pieces to mimic the base of Sally’s dress. All of the patches and colours were laid out and matched up to Sally to make sure the costume was 100% recognizable.
Next I took all of the patchwork pieces and hand painted the different patterns from Sally’s dress using Permaset Aqua. Heat setting the paint once it had dried. I wanted to give Sally a “handmade look” so I made sure that none of my painting was perfect. The brush strokes were messy, the hatch pattern wasn’t perfectly straight. But of course for the patterns that did need precision I either used a stencil to outline where I needed to paint, or used painter’s tape to outline the area.
I started with sewing the overskirt since I knew this would be the most amount of work. I pieced together each quadrant, sewing the different patches together, and then once the two front pieces were completed, I sewed down the middle seam, repeating the same steps for the back pieces.
For the main skirt and the blouse, I followed directly along with the pattern instructions, making any small tweaks along the way that I thought were necessary.
Once each piece of the costume was made, I then went back and hand stitched all of Sally’s patchwork stitching along the seam lines to make it look more hand made. I used strands of embroidery thread to make the stitches nice and thick, which also gives it a great tactile feeling.
As a finishing touch, and to stay safe in Covid times for photoshoots / future conventions I also made a fabric face mask of Sally’s mouth and nose.
Thoughts on this costume:
I don’t normally say yes to making costumes for other people, but this was a no-brainer. It was so much fun getting to work together with my sister to make this costume something she would love to wear over and over again. When she saw the completed costume for the first time, she was absolutely thrilled. This was the best reaction I could ever have hoped for, She was SO EXCITED! I was thrilled :)
This costume turned out beautifully. I’ve always loved to make costumes that challenge me, and this definitely did that. With having to alter the different pattern pieces so much and make sure that all the painting and stitching details were just right, even adding in a little easter egg that only true fans of the movie will pick out. Overall, this was a great experience, and so much fun to make. I would definitely make this costume again, or make another version of Sally some day :)
Awards:
2nd place in Fabricland West’s Homemade Halloween Contest!