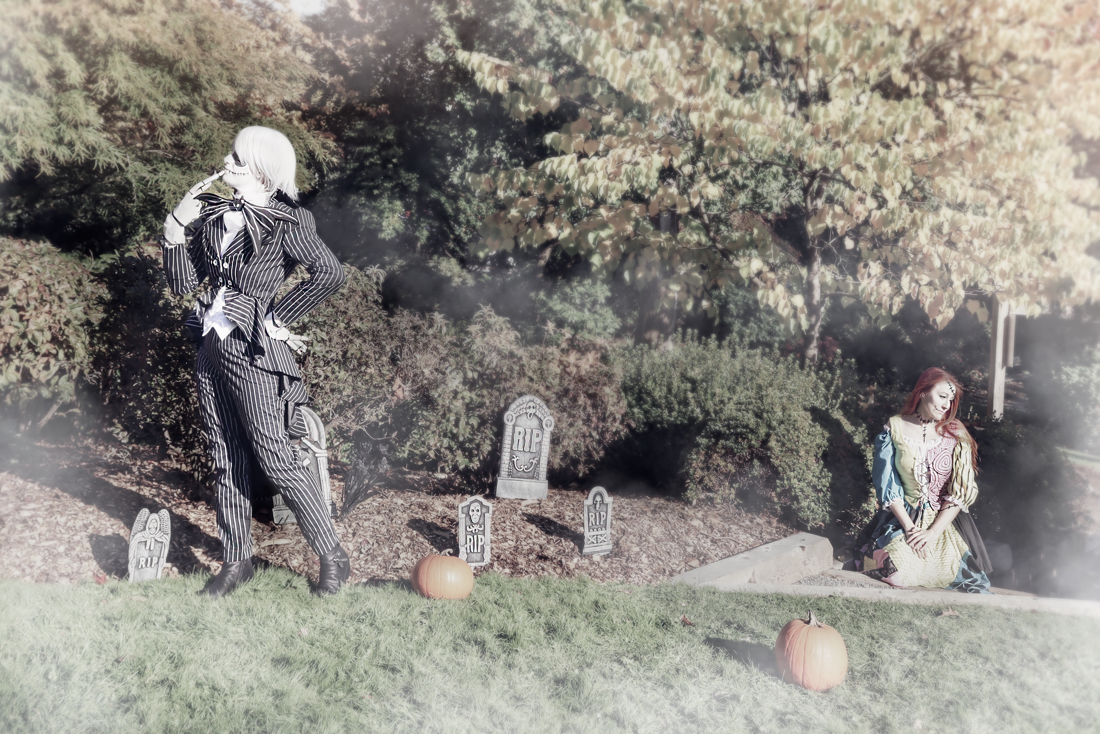
Why I chose to make this costume:
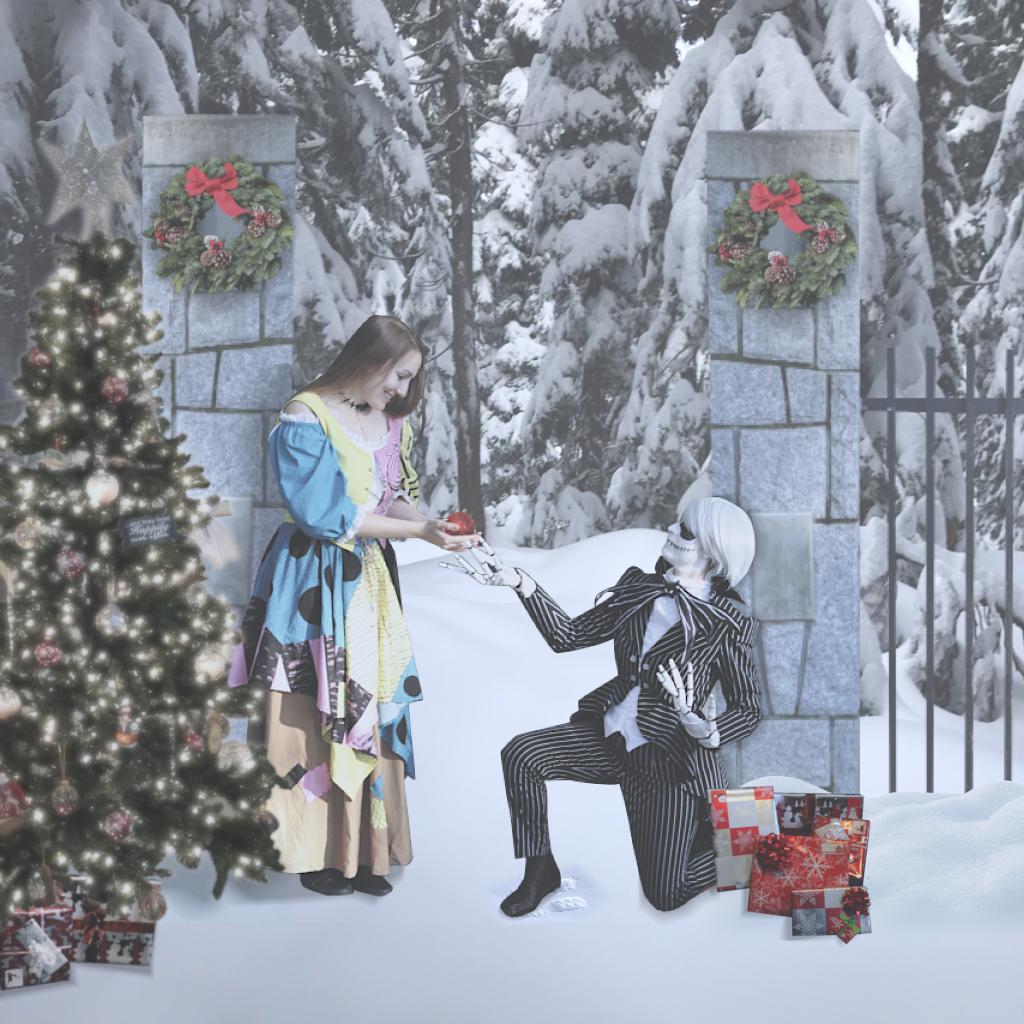
The Nightmare Before Christmas has been my favourite movie for as long as I can remember. The first time I ever saw the movie, I watched it from my bedroom window through the living room skylights. My parents had rented it and thought it would be too scary for me, even though I had picked it out at the video store. So I was sneaky and watched it from above and instantly fell in love with it all. I knew one day I would dress up as Jack, but I needed to do him justice. I didn't want to just make a basic pant suit, or buy a premade costume, I wanted to have the skills to make my own version of Jack. Something that would fit my style, be a mix of the original but also be sort of feminine.
How I made this costume:
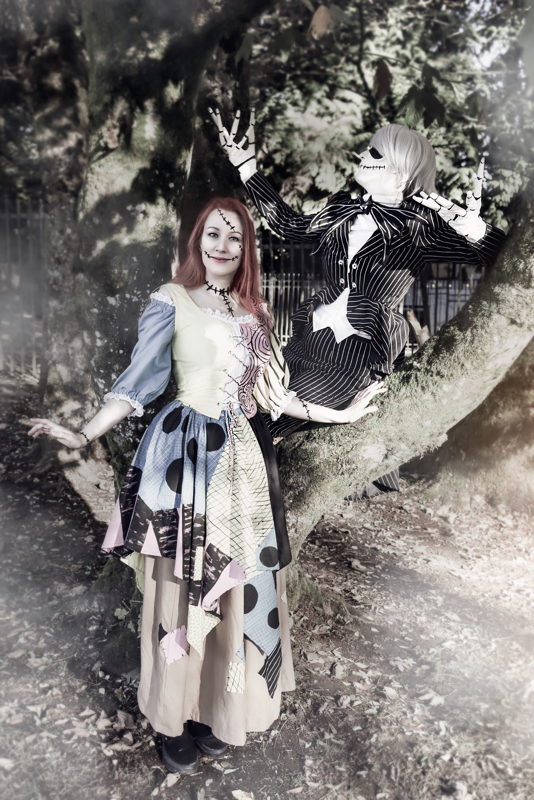
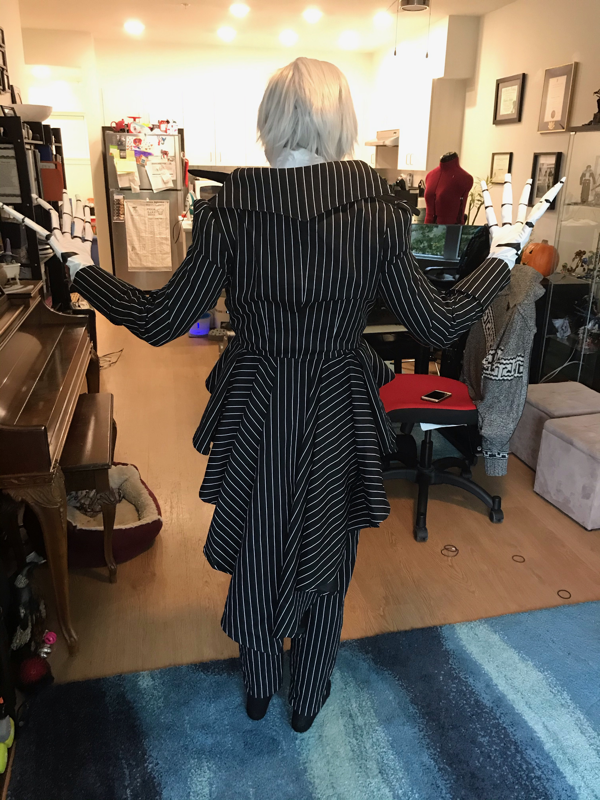
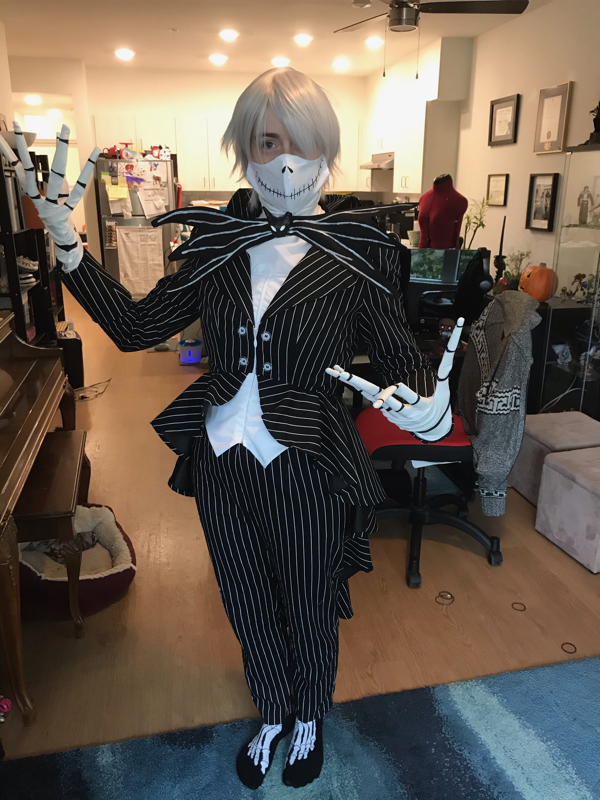
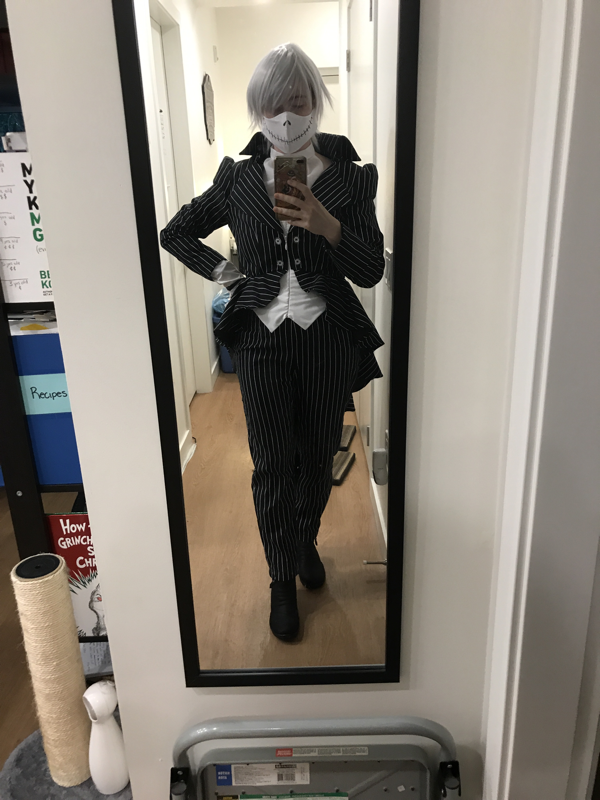
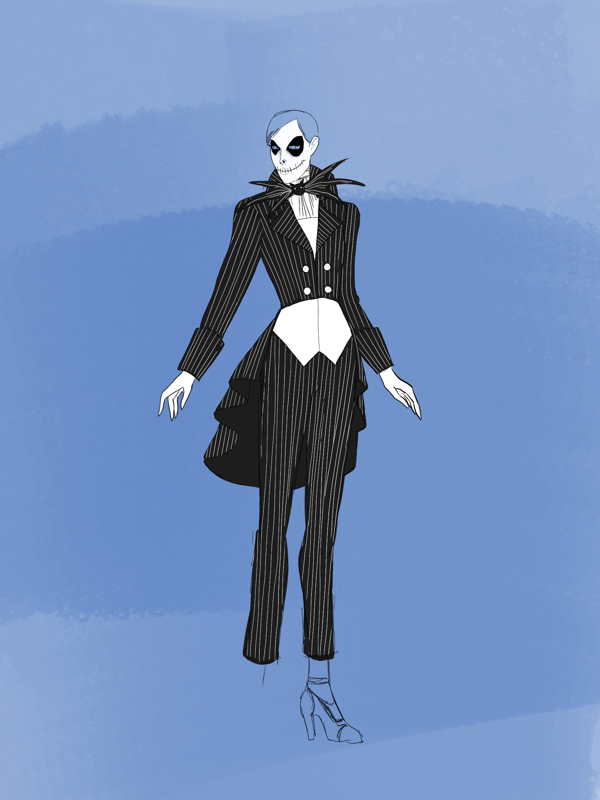
This costume is a combination of 3 different patterns. Initially I wanted to do a more steampunk skirt and jacket and the fabric store didn't have enough of the fabric left to make that pattern, so I changed my plans by going with the more traditional Jack suit. I chose Butterick 6718 for the pants pattern, McCall's 7641 for the jacket and used Simplicity 2172 for the bustier. I always start out by making each piece by the pattern instructions. Once the pants were made, I tailored them to be slimmer in the knee and calf area. For the Jacket, I combined Jacket A and Jacket B in order to get the look I wanted. I liked the skirt from Jacket A, but I liked the buttons and false shirt tails from Jacket B. So pieced the parts I liked together to make this new hybrid jacket. The hardest part was making sure all the pinstripes were facing the right way. I had to recut some pieces a few times realizing the stripes were in the wrong direction. I also changed out the interfacing in the lapels and the collar for stiffer sew in interfacing rather than fusible. This allows for the collar and lapels to stand up on their own with a lot less flop. I added a faux collar to the top of my bustier so that underneath the jacket you wouldn't be able to see any skin. This would mean less body paint for the finished look. I originally had magnets sewn into the top of the collar so that I could attach the bowtie that way, but sadly there were too many fabric layers in between, so I settled for a heavy duty snap.
The bat bowtie was made using foam clay for the bat head and painted with acrylic paint, then I added heavy duty wire into the tie pieces to help keep it's shape.
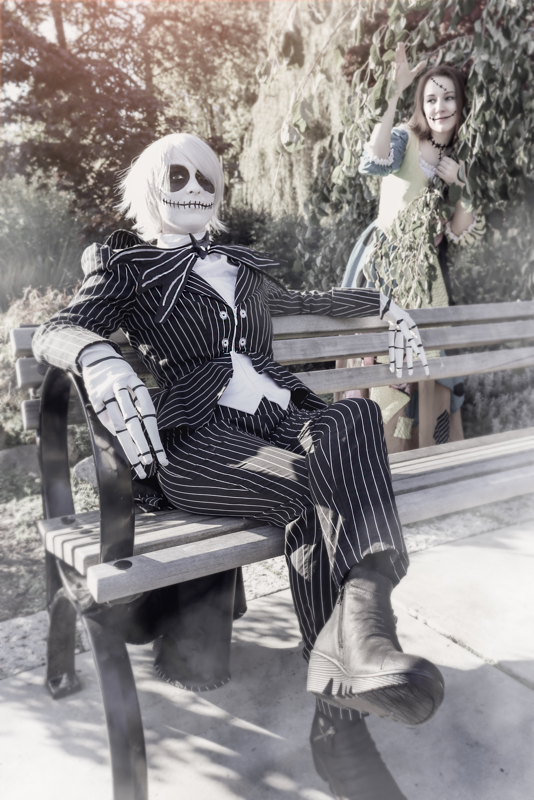
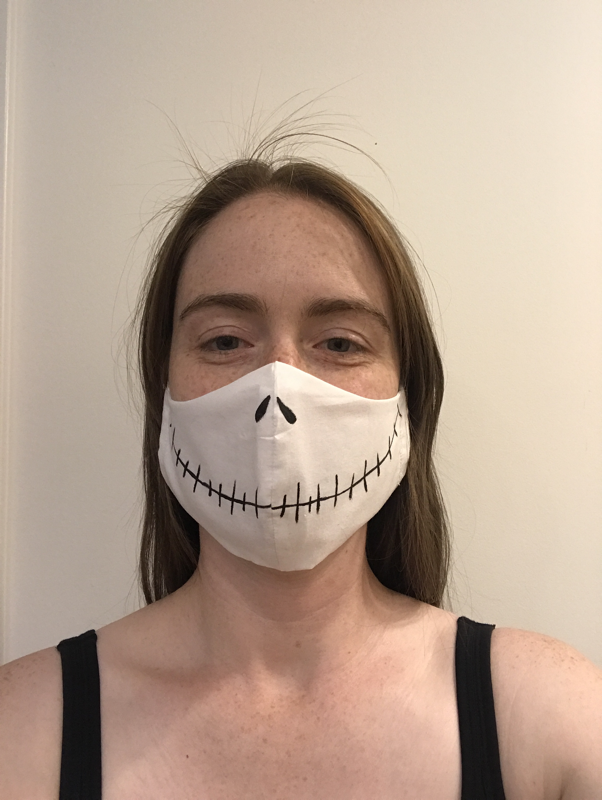
I also made a face mask and hand painted Jack's smile and nose on it for safety!
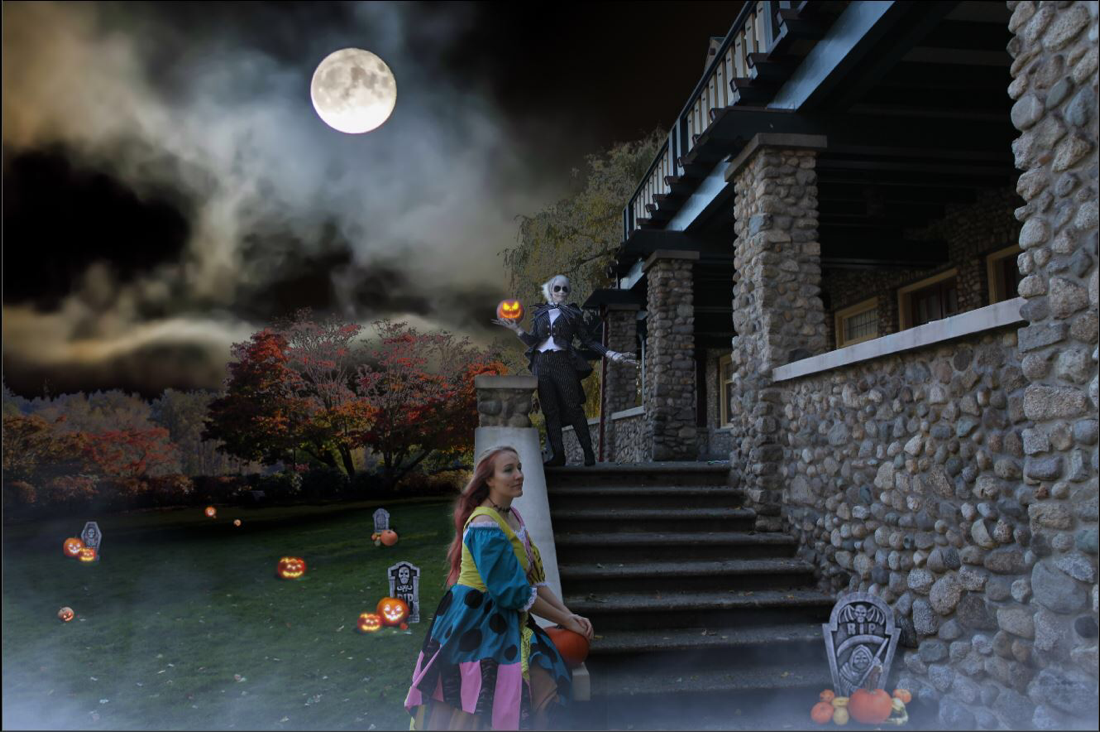
A lot of people have said their favourite part of this costume is the gloves, but those I can't take credit for. Those are the licensed Jack gloves from Spirit Halloween.
The face paint was the trickiest part of this costume. I started out with cream face paint from Spirit Halloween, and then quickly switched over to Mehron Paradise bodypaint. I learned during my makeup test that I am somewhat allergic to the cream paint, and apparently my eyeliner too. So this sparked some research into hypoallergenic makeup, and I found that using Marcelle eyeliner was a much better choice, and the Mehron Paradise paint is water activated, so you don't even feel like you are wearing it! It's also super easy to use and allows you to blend with other paints and eyeshadows. It's definitely pricey but totally worth it!
Thoughts on this costume:
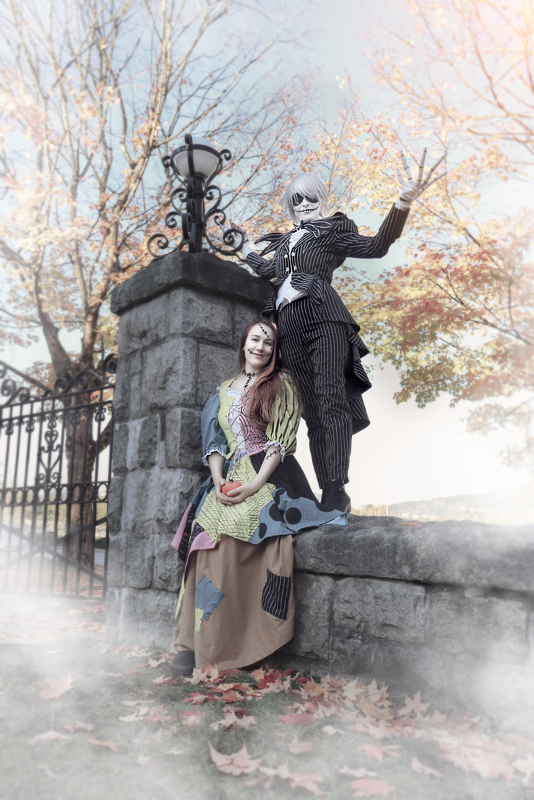
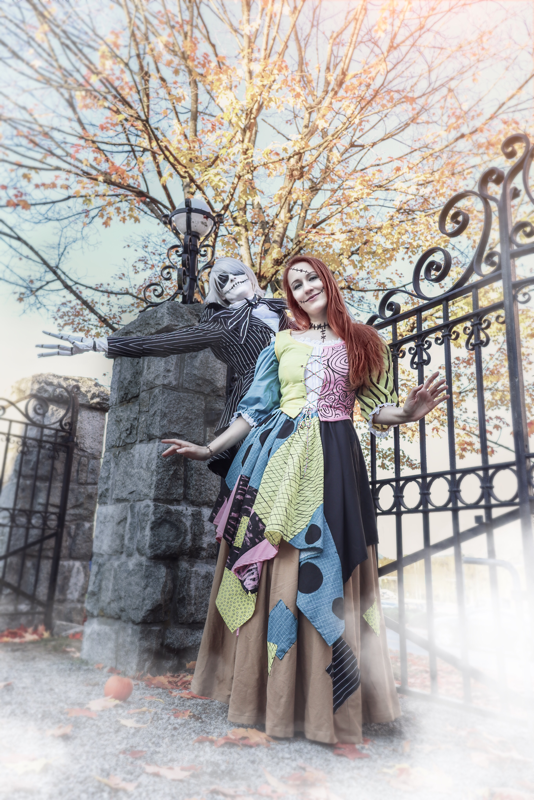
I'm thrilled how this turned out. I know I say that about most of my costumes, but I really am thrilled. This costume shows how far my sewing skills have come, my design planning, and it's super comfortable and fits like a glove. This is the type of costume I could wear at a convention all day without complaint. I even picked out shoes with memory foam in them for long time usage. The best part of this costume though is having Sally to go with it! This is my second time making a duo of costumes, but since these two are my all time favourite characters, these are definitely 2 of my favourite costumes :)
Awards:
2nd place in Fabricland West’s Homemade Halloween Contest!
The Nightmare Before Christmas has been my favourite movie for as long as I can remember. The first time I ever saw the movie, I watched it from my bedroom window through the living room skylights. My parents had rented it and thought it would be too scary for me, even though I had picked it out at the video store. So I was sneaky and watched it from above and instantly fell in love with it all. I knew one day I would dress up as Jack, but I needed to do him justice. I didn't want to just make a basic pant suit, or buy a premade costume, I wanted to have the skills to make my own version of Jack. Something that would fit my style, be a mix of the original but also be sort of feminine.
How I made this costume:
This costume is a combination of 3 different patterns. Initially I wanted to do a more steampunk skirt and jacket and the fabric store didn't have enough of the fabric left to make that pattern, so I changed my plans by going with the more traditional Jack suit. I chose Butterick 6718 for the pants pattern, McCall's 7641 for the jacket and used Simplicity 2172 for the bustier. I always start out by making each piece by the pattern instructions. Once the pants were made, I tailored them to be slimmer in the knee and calf area. For the Jacket, I combined Jacket A and Jacket B in order to get the look I wanted. I liked the skirt from Jacket A, but I liked the buttons and false shirt tails from Jacket B. So pieced the parts I liked together to make this new hybrid jacket. The hardest part was making sure all the pinstripes were facing the right way. I had to recut some pieces a few times realizing the stripes were in the wrong direction. I also changed out the interfacing in the lapels and the collar for stiffer sew in interfacing rather than fusible. This allows for the collar and lapels to stand up on their own with a lot less flop. I added a faux collar to the top of my bustier so that underneath the jacket you wouldn't be able to see any skin. This would mean less body paint for the finished look. I originally had magnets sewn into the top of the collar so that I could attach the bowtie that way, but sadly there were too many fabric layers in between, so I settled for a heavy duty snap.
The bat bowtie was made using foam clay for the bat head and painted with acrylic paint, then I added heavy duty wire into the tie pieces to help keep it's shape.
I also made a face mask and hand painted Jack's smile and nose on it for safety!
A lot of people have said their favourite part of this costume is the gloves, but those I can't take credit for. Those are the licensed Jack gloves from Spirit Halloween.
The face paint was the trickiest part of this costume. I started out with cream face paint from Spirit Halloween, and then quickly switched over to Mehron Paradise bodypaint. I learned during my makeup test that I am somewhat allergic to the cream paint, and apparently my eyeliner too. So this sparked some research into hypoallergenic makeup, and I found that using Marcelle eyeliner was a much better choice, and the Mehron Paradise paint is water activated, so you don't even feel like you are wearing it! It's also super easy to use and allows you to blend with other paints and eyeshadows. It's definitely pricey but totally worth it!
Thoughts on this costume:
I'm thrilled how this turned out. I know I say that about most of my costumes, but I really am thrilled. This costume shows how far my sewing skills have come, my design planning, and it's super comfortable and fits like a glove. This is the type of costume I could wear at a convention all day without complaint. I even picked out shoes with memory foam in them for long time usage. The best part of this costume though is having Sally to go with it! This is my second time making a duo of costumes, but since these two are my all time favourite characters, these are definitely 2 of my favourite costumes :)
Awards:
2nd place in Fabricland West’s Homemade Halloween Contest!